This blog will show you how to create Page in WordPress site and place this Page in Menu (Header Menu, Main Menu or Footer Menu) depending on your WordPress Theme.
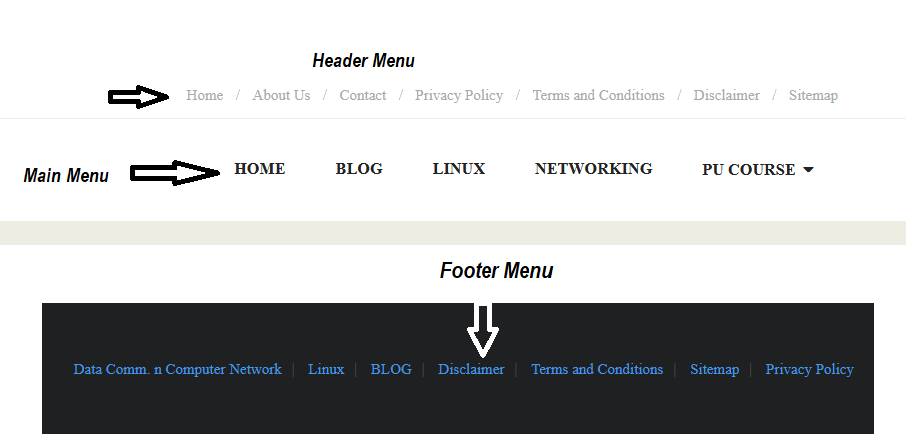
There are different menus in WordPress which can be shown below:
Follow below steps to proceed:
- First create Page on WordPress shown below “Pages –> Add New”

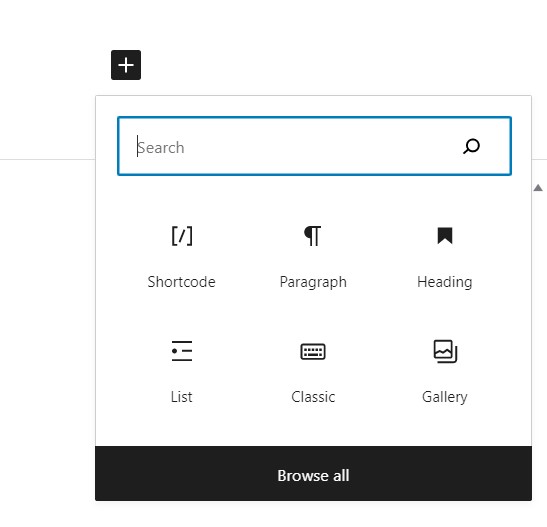
2. Give Name of the page for example: “About Us” and click on “+” icon to add paragraph, code, image or other.
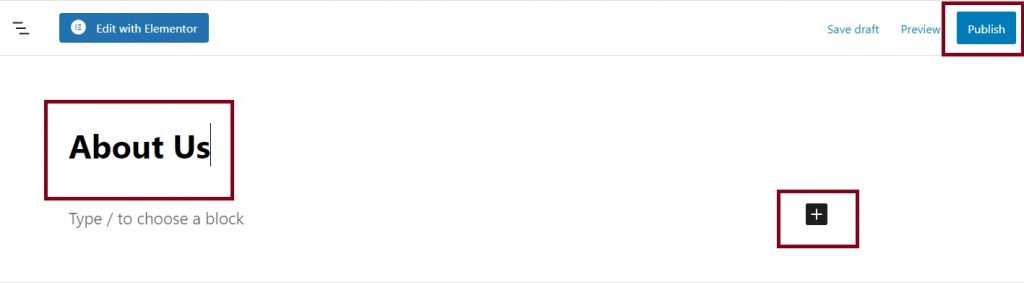
3. Once you have place your content on page click on “Publish” to activate the page and then exit to Dashboard by click “W” icon.

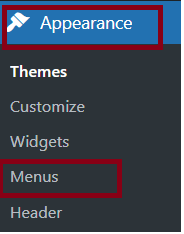
4. Then go to “Appearance –> Menus”
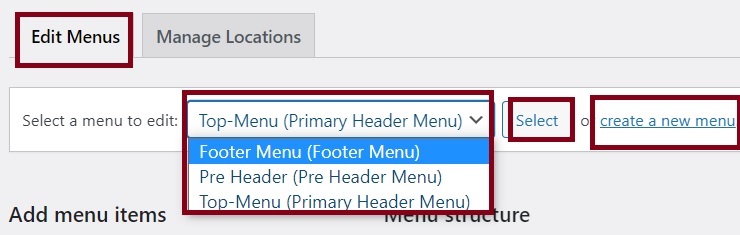
5. There are two section under Menu –> a. Edit Menu and b. Manage Location.
Under “Edit Menu” you can select Menus that are already created and select it. Or if no menu is present click “Create New Menu”.
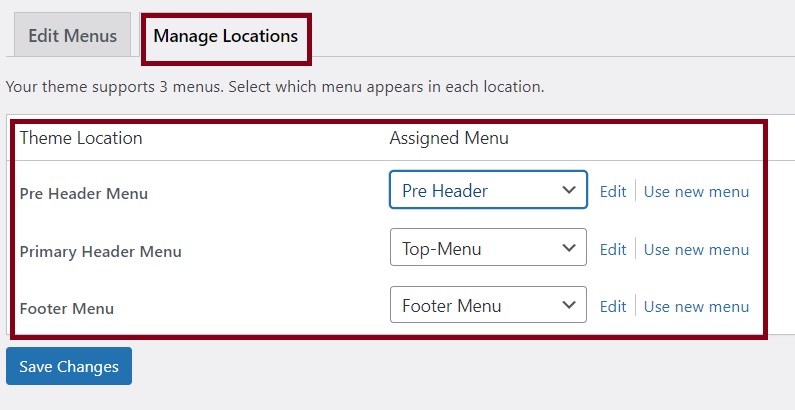
6. Which ever menu you choose or create the most important thing is where you want to place that menu in your website just like below image I have shown you earlier.
7. Now go to second section of Menu ie. “Manage Location”. You can leave this as default, now need to make any changes.
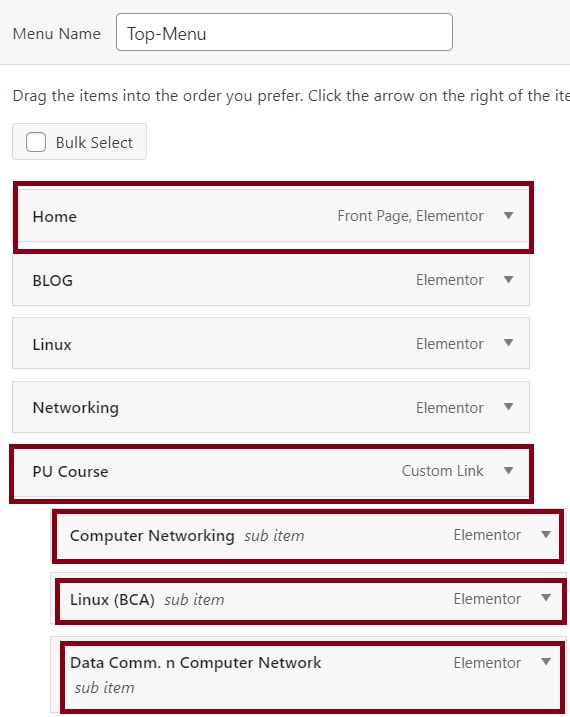
8. Go to “Edit Menu” select “Top Menu” this menu is my primary menu. Then from left side click the Pages you want to put on this Menu. Once selected click on “Add to Menu” button so they will appear on the right side.

9. Using mouse you can rearrange these menus in the way you can to see.
For example I have arrange my Menu as shown below:
Home is my first menu from left side, then Blog.
If you want to put submenu just like “Computer networking” page is under “PU course” use your cursor to drag the menu under PU Course as shown below.
10. In this way we have customize our Main Menu, you can select “Header Menu ” or “footer Menu” as guided on above steps.